Google analytics is the mostly used web analytic service on the internet. google analytics is a web analytics services offered by google which tracks and reports the website traffic. Google launched this service in the year 2005.
The new version of google analytics tracking code is asynchronous tracking code, which is more sensitive and accurate, and it is able to track even small activity on the websites.
Google analytics is integrated with AdWords, users can review online campaigns by tracking landing page quality and conversions. Goals might include sales, lead generation, viewing a specific page, or downloading a particular file.
Google Analytics’ approach is to show high-level dashboard-type data for the casual user, and more in-depth data further into the report set. Google Analytics analysis can identify poorly performing pages with techniques such as funnel visualization, where visitors came from, how long they stayed and their geographical position. It also provides more advanced features, including custom visitor segmentation.
Google Analytics e-comers reporting can track sales activity and performance. The e-commerce reports show a site’s transactions, revenue, and many other commerce-related metrics.
There are some limitations for the google analytics code many browsers extensions like AD Block can block the google analytics script code. Hence we may lose the exact website tracking data. If the user is removed their cookies in the browsers, then google analytics is unable to track the user data.
How to add google analytics code:
Step 1:
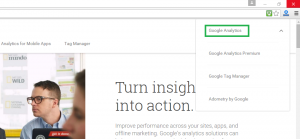
Search for google analytics. On the first link itself, you will get the google analytics page.
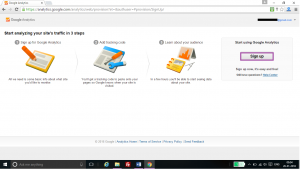
Step2: sign in to google analytics if you have already account or signed up if you don’t have account
Sign in to google analytics.
Step 3: Login to google analytics account with google account. If you don’t have account login with your email details.
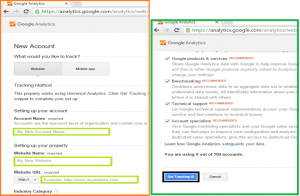
Step 4: Add your website and details to get analytics code.
Add your blogger blog or website details which you want to analyse the web traffic.
Accept terms and conditions.
Step 5: after accepting terms and conditions you will get Tracking ID as show in the figure.
Step 6: login to your blogger account. Open your blog dash board.
Step 7: go to settings >> other.
Step 8: add your analytic tracking id and hit save settings button.
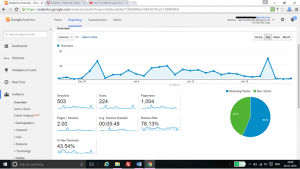
That’s all. You can simply monitor your blog page views, bounce rate, Avg-session durations and find where you are getting more traffic country and city wise and more.


